Creating low poly assets is a popular technique in game development, particularly for mobile games and stylized art directions. This guide will take you through the process of mastering low poly assets in Unity, from understanding the basics to implementing advanced techniques for optimization and aesthetics.
Understanding Low Poly Art
What is Low Poly Art?
Low Poly Assets art refers to 3D models that are created with a relatively low number of polygons. This style was initially a necessity due to hardware limitations but has since become an artistic choice due to its unique and visually appealing aesthetic.
Benefits of Low Poly Assets Art
- Performance: Fewer polygons mean lower computational requirements, which can enhance game performance, especially on mobile devices and VR platforms.
- Aesthetics: The simplified, clean look of low poly art can be visually striking and can evoke a specific artistic style.
- Development Speed: Low poly models are generally quicker to create than high poly models, allowing for faster prototyping and iteration.
Creating Low Poly Assets Models in Detail
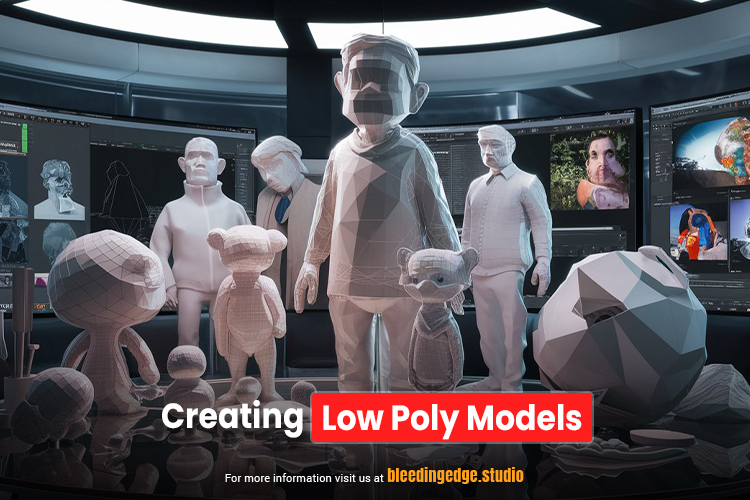
To effectively create Low Poly Assets models, it’s essential to dive deeper into the techniques and workflows that help maintain a balance between simplicity and visual appeal. Here, we’ll cover the step-by-step process, from the initial concept to the final model ready for import into Unity.

Step 1: Concept and Planning
Concept Art
Before diving into modelling, having a clear concept is crucial. Concept art serves as a visual guide and ensures that the final model aligns with the overall design vision. Sketch out your ideas, focusing on the major shapes and silhouettes rather than intricate details.
Reference Gathering
Gather reference images to guide your modelling. These can be real-world photos, sketches, or other 3D models. References help maintain accuracy and consistency in your designs for Low Poly Assets.
Step 2: Basic Shape Creation
Starting with Primitives
Begin by blocking out your model using basic geometric shapes such as cubes, spheres, and cylinders. This stage is about establishing the overall form and proportions of your model.
- Add a Cube: In Blender, you can start with a cube by pressing Shift + A and selecting Mesh> Cube.
- Scale and Position: Use the G key to move, the S key to scale, and the R key to rotate your primitives into the desired position.
Step 3: Refining the Shape
Extrusion and Inset
Once the basic shape is established, refine it using extrusion and inset techniques.
- Extrude: Select a face, edge, or vertex and press E to extrude it outwards or inwards. This is useful for adding details like limbs on a character or extensions on a structure.
- Inset: Use the I key to inset faces. This creates a new face within the selected face, which can then be extruded or manipulated further.
Edge Loop and Knife Tool
Adding edge loops helps define the shape and maintain a clean topology.
- Edge Loop: Press Ctrl + R and hover over the model to see a preview of where the loop will be added. Click to place the loop and adjust its position.
- Knife Tool: Press K to activate the knife tool and manually cut edges into your Mesh. This is useful for creating more complex shapes.
Step 4: Simplifying Geometry
Decimate Modifier
The Decimate modifier reduces the polygon count while maintaining the model’s overall shape of Low Poly Assets.
- Apply Decimate: In Blender, go to the Modifiers tab, add the Decimate modifier, and adjust the ratio to reduce the polygon count.
- Manual Optimization: Manually remove unnecessary vertices and edges by selecting them and pressing X.
Maintaining Clean Topology
Clean topology ensures the model deforms correctly if animated and simplifies texturing.
- Avoid N-gons: Use quads (four-sided polygons) instead of n-gons (polygons with more than four sides) to maintain a clean mesh.
- Triangulate: Sometimes, converting quads to triangles can help in maintaining shape and simplifying the geometry. Select the Mesh and press Ctrl + T to triangulate.
Step 5: UV Unwrapping
Marking Seams
Seams are the edges where the model will be “cut” for UV unwrapping of Low Poly Assets.
- Select Edges: Select the edges where you want to place seams.
- Mark Seams: Press Ctrl + E and choose “Mark Seam.”
Unwrapping
After marking the seams, unwrap the model.
- Select All: Press A to select the entire model.
- Unwrap: Press U and select “Unwrap.” Blender will generate a 2D UV map of your model.
Step 6: Texturing
Creating Textures
Low poly models often use simple textures, including flat colours, gradients, and hand-painted details.
- Flat Colors: Use solid colours directly applied to faces in your 3D software.
- Gradient Maps: Create gradient textures to add depth without increasing complexity.
- Hand-Painted Textures: Use software like Photoshop or Substance Painter to create hand-painted textures that add a unique artistic touch.
Applying Textures in Blender
- Assign Materials: In the Materials tab, create a new material and assign it to your model.
- UV/Image Editor: In the UV/Image Editor, load your texture and adjust the UV map to fit the texture appropriately in Low Poly Assets.
Step 7: Exporting for Unity
Preparing for Export
Ensure your model is correctly scaled and positioned. Apply all transformations to avoid issues in Unity.
- Apply Transforms: Press Ctrl + A and select “Apply All Transforms.”
- Clean Up: Remove any unused vertices and objects from your scene.
Export as FBX
- Export: Go to File > Export > FBX.
- Settings: In the export settings, ensure that you include only the necessary objects and apply scale settings as needed.
Step 8: Importing into Unity
Drag and Drop
Drag the FBX file into Unity’s Assets folder. Unity will import the model, and you can start using it in your scenes.
Material and Texture Setup
- Materials: Unity will automatically create materials based on your model’s texture slots. Adjust the materials as needed by the Inspector.
- Textures: Ensure the textures are correctly assigned and adjust any settings, such as tiling and offset.
Basic Modeling Techniques
- Start Simple: Begin with basic shapes and extrude or modify them to form more complex structures.
- Edge Loops: Use edge loops to control the flow of geometry and maintain a clean topology.
- Mirror Modifier: Utilize mirror modifiers to create symmetrical models efficiently.
- Decimate Modifier: In Blender, use the decimate modifier to reduce polygon count while maintaining the overall shape.
Tips for Low Poly Assets Modeling
- Use Reference Images: Always use reference images to guide your modelling process and ensure accuracy.
- Keep it Simple: Focus on capturing the essence of the shape rather than intricate details.
- Optimize as You Go: Continuously check for unnecessary polygons and optimize them during the modelling process.
Texturing Low Poly Assets Models
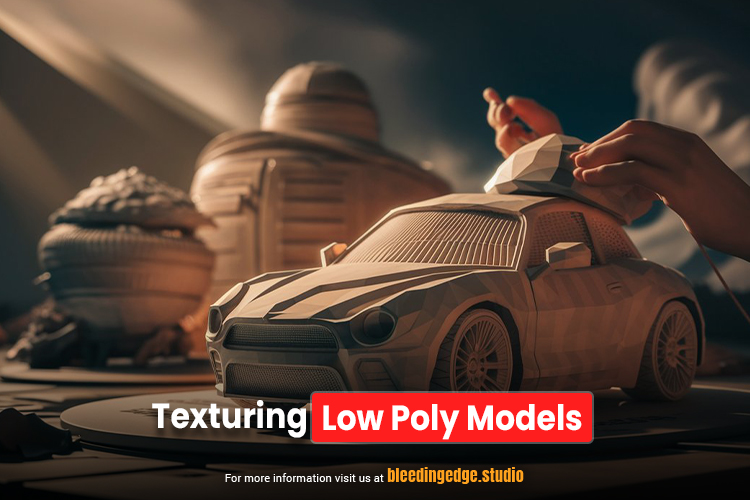
Texturing is a critical step in bringing your low poly models to life. It enhances the visual appeal of the model by adding colour, details, and depth without increasing the polygon count. This section will cover UV unwrapping, texturing techniques, and practical tips for creating efficient and beautiful textures.

UV Unwrapping
UV unwrapping is the process of flattening a 3D model’s surface into a 2D representation, which allows you to paint textures onto it accurately. Here’s a detailed guide on UV unwrapping:
Marking Seams
- Identify Natural Seams: Look for natural breaks in the model where seams would logically occur, such as edges or borders.
- Select Edges: In your 3D software, select the edges where you want to place seams. In Blender, you can use Alt + Click to select an edge loop quickly.
- Mark Seams: Press Ctrl + E and choose “Mark Seam.” This creates a cut along the selected edges.
Unwrapping the Model
- Select All: Press A to select the entire model.
- Unwrap: Press U and select “Unwrap.” Blender will generate a 2D UV map of your model.
- Check the UV Layout: Open the UV/Image Editor to inspect the UV layout. Ensure that the UV islands (flattened sections) make efficient use of space and minimize stretching.
Texturing Techniques
Different texturing techniques can be used depending on the desired look and the complexity of the model.
Flat Colors
Flat colours are straightforward and often used in low poly art to maintain a clean and simple look.
- Assign Materials: In Blender, go to the Materials tab, create a new material, and assign it to your model.
- Apply Colors: Use the Base Color option to set a solid colour for each part of your model.
Gradient Maps
Gradient maps add a subtle variation in colour, providing more depth and visual interest without complexity.
- Create a Gradient Texture: In your image editing software (e.g., Photoshop), create a gradient texture.
- Apply the Gradient: In Blender, use the UV/Image Editor to load the gradient texture and adjust the UV layout to fit the gradient appropriately.
Hand-Painted Textures
Hand-painted textures can add a unique and artistic touch to your Low Poly Assets models.
- Create a Texture Map: In software like Photoshop or Substance Painter, paint your texture directly onto the UV map.
- Apply the Texture: Import the painted texture into Blender and assign it to your model through the UV/Image Editor.
Practical Tips for Texturing
Maintain a Consistent Style
Ensure that the textures you create are consistent with the overall art style of your project. This consistency helps maintain a cohesive look across all assets.
Optimize Texture Resolution
For performance optimization, keep texture resolution as low as possible without sacrificing quality. Common resolutions for low poly textures range from 128×128 to 512×512 pixels.
Use Texture Atlases
Combine multiple textures into a single texture atlas to reduce the number of texture swaps and draw calls in for Low Poly Assets Unity.
- Create the Atlas: In your image editing software, arrange multiple textures into one large image.
- Adjust UVs: In Blender, adjust the UVs of your model to map to the correct parts of the atlas.
Applying Textures in Blender
Assigning Materials
- Create a New Material: In the Materials tab, click the “New” button to create a new material.
- Assign the Material: Select the parts of your model and assign the material to them.
Using the UV/Image Editor
- Open the UV/Image Editor: Switch to the UV/Image Editor window.
- Load the Texture: Click “Open” to load your texture image.
- Adjust UVs: Ensure the UV map aligns correctly with the texture.
Exporting Textured Models for Unity
Preparing for Export
Before exporting, ensure all textures are properly assigned, and the model is scaled correctly.
- Apply Transforms: Press Ctrl + A and select “Apply All Transforms.”
- Check UV Mapping: Ensure that the UV mapping is correct and there are no overlapping UVs.
Exporting as FBX
- Export Settings: Go to File > Export > FBX. In the export settings, ensure that “Include Materials” and “Include UVs” are checked.
- Export: Save the FBX file to your project directory.
Importing Textures into Unity
Importing the Model
- Drag and Drop: Drag the FBX file into Unity’s Assets folder.
- Material Setup: Unity will create materials based on the textures. Ensure these materials are correctly assigned to the Inspector.
Adjusting Texture Settings
- Select the Texture: In the Project window, select the imported texture.
- Adjust Settings: In the Inspector, you can adjust settings such as filter mode, wrap mode, and compression to optimize performance and quality.
Importing Models into Unity
Preparing Your Models
Before importing, ensure your models are optimized and correctly scaled. Apply all transformations (location, rotation, and scale) in your modelling software.
Importing Process
- Export as FBX: Export your model in the FBX format, which is widely supported and reliable.
- Import into Unity: Drag and drop the FBX file into your Unity project’s Assets folder.
- Material Setup: Assign materials to your model. Unity will automatically create materials for each texture slot in your model of Low Poly Assets.
Optimizing Performance in Unity
Mesh Optimization
- Level of Detail (LOD): Implement LOD groups to use different levels of detail based on the camera’s distance from the object.
- Mesh Combining: Combine meshes to reduce draw calls and improve performance.
Texture Optimization
- Texture Atlases: Combine multiple textures into a single atlas to reduce texture swaps and draw calls.
- Compression: Use texture compression to reduce memory usage without significantly compromising quality.
Other Tips
- Occlusion Culling: Use occlusion culling to avoid rendering objects that are not visible to the camera.
- Lighting: Use baked lighting where possible to save on real-time computation of Low Poly Assets.
Enhancing Visual Appeal
Lighting and Shading
Lighting and shading play a crucial role in defining the look and feel of your low poly assets in Unity. Proper lighting can enhance the visual appeal, highlight the unique characteristics of your models, and create the desired atmosphere in your scenes. This section will cover the basics of lighting and shading, techniques for flat shading, and tips for optimizing lighting in Unity.

Basics of Lighting in Unity
Unity offers a variety of lighting options and settings to illuminate your scenes effectively. Understanding these basics will help you achieve the desired look for your low poly assets in Low Poly Assets.
Types of Lights
- Directional Light: Simulates sunlight and affects all objects in the scene equally. It’s great for outdoor scenes.
- Point Light: Emits light in all directions from a single point, similar to a light bulb. Useful for simulating localized light sources.
- Spot Light: Emits light in a cone shape, useful for focused lighting such as flashlights or spotlights.
- Area Light: Emits light from a rectangular area. This type is more complex and typically used in high-quality rendering of Low Poly Assets.
Lighting Settings
- Intensity: Controls the brightness of the light source.
- Colour: Changes the colour of the light, allowing for creative lighting setups.
- Range: Defines how far the light reaches. Relevant for Point and Spot lights.
- Shadow Type: Determines whether the light casts shadows and the quality of those shadows (e.g., hard, soft).
Advanced Lighting Techniques
To further enhance the visual appeal of your low poly scenes, you can employ advanced lighting techniques.
Ambient Lighting
Ambient lighting provides a base level of light to all objects in the scene, ensuring that no part of the model is completely dark.
- Ambient Light Settings: Go to Window > Rendering > Lighting Settings in Unity.
- Environment Lighting: Adjust the source and intensity of ambient light to complement your scene of Low Poly Assets.
Light Probes and Reflection Probes
- Light Probes: Use light probes to capture and interpolate lighting information for dynamic objects that move through your scene.
- Place light probes strategically around your scene to ensure consistent lighting for moving objects.
- Reflection Probes: Use reflection probes to capture the surroundings and create accurate reflections on reflective materials.
- Place reflection probes in areas where accurate reflections are crucial, such as near shiny surfaces or water in Low Poly Assets.
Baked Lighting
Baking lighting involves pre-computing lighting information and saving it into textures (lightmaps), reducing the runtime lighting calculations needed and improving performance of Low Poly Assets.
- Bake Settings: In the Lighting Settings window, adjust the bake settings for lightmaps.
- Bake Lights: Mark lights as baked (as opposed to real-time) to include them in the lightmap baking process.
- Generate Lightmaps: Click “Generate Lighting” to bake the lighting into your scene.
Optimizing Lighting for Performance
While good lighting is essential, it’s equally important to optimize it to ensure your game runs smoothly, especially on lower-end hardware.
Reduce Real-Time Lights
- Limit Real-Time Lights: Use baked lighting wherever possible to minimize the performance impact of real-time lights.
- Light Culling: Use culling masks to limit which objects are affected by specific lights of Low Poly Assets.
Optimize Shadows
- Shadow Quality: Adjust the quality of shadows in the Quality Settings to balance performance and visual fidelity.
- Shadow Distance: Set an appropriate shadow distance to ensure shadows are rendered within a reasonable range without consuming unnecessary resources in Low Poly Assets.
Use Lightmaps
- Efficient Lightmap Usage: Optimize lightmap resolution and use UV packing to make efficient use of space.
- Atlasing: Combine multiple lightmaps into a single atlas to reduce draw calls and improve performance of Low Poly Assets.
Practical Tips for Lighting and Shading
- Consistency: Maintain a consistent lighting style throughout your scene to ensure a cohesive look.
- Contrast and Color: Use contrast and colour in your lighting to highlight important areas and create mood.
- Testing: Continuously test your lighting setups on different hardware to ensure performance and visual quality balance.
Post-Processing Effects
- Colour Grading: Adjust the overall colour palette of your game to create a cohesive look.
- Ambient Occlusion: Add depth to your scenes by simulating soft shadows in crevices and corners.
- Bloom: Use bloom to make bright areas of your scene glow, adding a magical quality of Low Poly Assets.
Conclusion
Mastering low poly assets in Unity involves a balance of artistic skill and technical know-how. By understanding the principles of low poly art, mastering modelling and texturing techniques, and optimizing your assets for performance, you can create visually stunning and efficient games. Keep experimenting and refining your skills, and you’ll be able to leverage the unique charm of low poly art to make your Unity projects stand out.
For more topics, see https://bleedingedge.studio/blog/

