Unleash the art of Mastering Anisotropic Texture in Unity: Enhancing Visual Realism and Performance in 2023.
Introduction:
In video game development and 3D graphics, creating immersive and realistic environments is a fundamental goal through anisotropic textures. One crucial aspect that significantly contributes to visual realism is textures. Unity, a popular game engine, provides developers with many tools to achieve stunning visuals. One such tool is anisotropic texturing, which takes your game’s graphics to the next level by providing improved detail and surface realism. In this blog, we will explore anisotropic textures, understand their significance, and learn how to implement them effectively in Unity.

Textures are crucial in game development and computer graphics, adding visual details and realism to 3D objects and environments. Here are some different types of textures commonly used in game development:
- Diffuse Texture (Albedo Texture): The diffuse or albedo texture is the most common texture used in games. It defines the base color and appearance of an object. Diffuse textures represent the surface’s color and diffuse reflectance properties, determining how the object interacts with light sources. They are usually 2D images and serve as the foundation for other textures.
- Normal Map Texture: Normal maps simulate surface details without adding geometric complexity. They store per-pixel normals in an RGB format, allowing the shader to calculate the object’s lighting as if it had more detailed geometry. This creates the illusion of bumps, creases, or indentations on the surface, enhancing the object’s visual quality without adding extra polygons.
- Specular Map Texture: Specular maps control the intensity and shininess of specular highlights on an object’s surface. Specular highlights are the bright spots when light reflects directly off a surface. Specular maps are often grayscale images where brighter areas indicate higher specular intensity, while darker areas are less reflective.
- Roughness (Glossiness) Map Texture: Roughness or glossiness maps control the surface’s smoothness or roughness. They determine how much light is scattered or reflected off the surface. A roughness map controls the size and blurriness of the specular highlights. Lower roughness values result in sharper, more concentrated highlights, while higher roughness values create softer, more diffuse highlights.
- Ambient Occlusion Map Texture: Ambient occlusion maps simulate soft shadows and darkening in areas where surfaces are close together or occluded from direct lighting. They are grayscale images where darker areas represent occluded regions and lighter areas represent exposed areas. Ambient occlusion maps add depth and realism to the scene by enhancing the object’s contact shadows.
- Emissive Map Texture: Emissive maps control the self-illumination of an object. They determine which parts of the object emit light, allowing artists to create glowing or emissive materials, such as glowing signs, sci-fi panels, or magical effects.
- Height Map (Displacement Map) Texture: Height maps are used in displacement mapping to add actual geometric details to the surface of an object. They define the height or depth of each pixel, effectively creating a 3D surface from a 2D texture. Displacement mapping can add intricate details like bricks, scales, or wrinkles to objects without significantly increasing the polygon count.
- Opacity (Alpha) Map Texture: Opacity maps control the transparency or opacity of an object. They are grayscale images, where white areas are fully opaque and black areas are fully transparent. Opacity maps are commonly used for creating transparent objects like foliage, glass, or water.
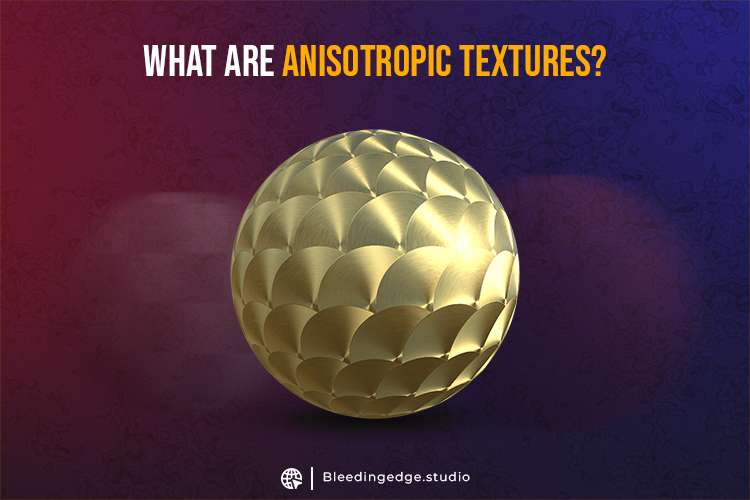
- Anisotropic Map Texture: Anisotropic maps are used to achieve the anisotropic effect on surfaces with directional characteristics, such as brushed metal or hair. They define the direction of elongated reflections, enhancing the realism of these materials.
- PBR (Physically Based Rendering) Texture Set: PBR texture sets combine various textures (albedo, normal, roughness, metallic, and ambient occlusion) into a single material representation. PBR textures are designed to work with physically based rendering systems, providing a unified and consistent approach to material representation and rendering.
Each type of texture serves a specific purpose in the rendering pipeline and contributes to the game world’s overall visual fidelity and realism. Game developers can use and combine these textures to create stunning and immersive virtual environments for players to explore and enjoy.
Understanding Anisotropic Textures:
Anisotropic textures, also known as anisotropic filtering, is a rendering technique that improves the appearance of surfaces when viewed from oblique angles. In simple terms, it reduces the blurriness and distortion that occurs on surfaces, especially those with repetitive patterns, when viewed from a sharp angle. This effect is particularly noticeable on surfaces like roads, wood, and other materials with prominent grooves or patterns.

Advantages of Anisotropic Textures:
- Improved Visual Realism: Anisotropic filtering helps maintain sharpness and clarity on textured surfaces, even when viewed at extreme angles. Traditional filtering techniques like bilinear or trilinear filtering can cause textures to appear blurry or jagged when seen from oblique angles. Still, anisotropic filtering preserves texture details and produces more accurate representations of materials. As a result, the game world feels more lifelike and immersive, drawing players deeper into the experience.
- Enhanced Detail: Small details and delicate patterns on surfaces become much more noticeable with anisotropic textures. Anisotropic filtering considers the surface’s direction and applies different levels of filtering along each axis. This adaptive filtering ensures that texture details, such as scratches on metal or wood grain, are consistently clear and crisp regardless of the camera’s angle. The level of detail added by anisotropic textures enhances the realism of the game’s environments and objects.
- Optimization: Despite the increased level of detail, anisotropic filtering can also help improve performance in specific scenarios. This might seem counterintuitive since more detailed textures can strain the graphics processing. However, anisotropic filtering operates in a way that is generally independent of scene complexity. Unlike other rendering techniques, it does not significantly impact frame rates, making it an efficient solution for achieving better visuals without sacrificing smooth gameplay.
- Consistency Across Devices: Anisotropic filtering helps maintain a consistent level of quality across different devices and resolutions. When playing a game on various platforms or screen sizes, anisotropic filtering ensures that texture details remain sharp and consistent, delivering a unified visual experience to all players.
Implementing Anisotropic Textures in Unity:
Unity makes it relatively straightforward to enable anisotropic filtering for textures. Here’s a step-by-step guide to implementing anisotropic textures in your Unity project:

- Open Unity and the target project.
- Select Texture: Choose the texture you want to apply anisotropic filtering to. In the Inspector window, you will find Texture Import Settings.
- Adjust Texture Import Settings: Find the “Filter Mode” option under the Texture Import Settings. Choose either “Trilinear” or “Anisotropic” from the dropdown menu. Selecting “Anisotropic” activates the anisotropic filtering.
- Set Anisotropic Level: Once you’ve selected “Anisotropic,” you’ll see an option to set the level of anisotropy. This value determines the quality of the filtering applied to the texture. Higher levels offer better quality but may impact performance, so find a balance for your project.
- Test and Optimize: After enabling anisotropic filtering, thoroughly test your game on devices and platforms to ensure it runs smoothly without compromising performance. Adjust the anisotropic level to find the optimal balance between visuals and performance.
Let’s explore more points about anisotropic textures in Unity:
- Performance Considerations: While anisotropic textures can significantly improve visual fidelity, they can be more computationally expensive than standard textures. As anisotropic filtering requires additional calculations, it may impact the overall performance of your game, especially on lower-end devices. It is essential to balance visual quality and performance by judiciously using anisotropic textures and optimizing other aspects of your game.
- Anisotropic Filtering Modes: Unity offers different modes of anisotropic filtering, which determine how the engine handles texture sampling at oblique angles. These modes include “Per Texture,” “Per-Texture 2x,” “Per-Texture 4x,” “Force 4x,” and “Force 8x.” Each mode has its performance and quality trade-offs, so choosing the appropriate mode based on your target platform and desired visual outcome is essential.
- Texture Tiling and Offset: Anisotropic textures can behave differently when tiled or offset on a surface. As the elongated reflections depend on the surface orientation, tiling or offsetting may cause visual artifacts or inconsistencies. Careful adjustments to the texture coordinates and UV mapping can help mitigate these issues and ensure a seamless anisotropic effect.
- Limitations of Built-in Shaders: Unity’s built-in shaders provide some support for anisotropic textures, but they may have limitations compared to custom shaders. If you require more control over the anisotropic effect or need to achieve specific visual styles, consider using custom shaders or Shader Graphs to create tailored solutions.
- Anisotropic Texture Generation: Creating anisotropic textures can be an artistic challenge. Artists often use software like Substance Designer or Blender to generate these specialized textures that encode the direction of elongated reflections. These tools allow for procedural and customizable texture creation, providing artists with flexibility and efficiency in generating anisotropic maps.
- Anisotropic Specular Highlights: Anisotropic textures are not limited to diffuse reflections; they can also be applied to specular highlights. This allows for more precise control over the surface appearance, making materials like brushed metal or hair look even more realistic.
- Combining with Other Techniques: Anisotropic textures can be combined with other rendering techniques, such as normal mapping, parallax mapping, or physically based rendering (PBR), to achieve a more comprehensive and lifelike rendering of surfaces in your game.
- Mobile Platforms and Performance: When developing mobile platforms, it’s essential to assess the performance impact of anisotropic textures carefully. Consider using lower-resolution anisotropic maps or applying the effect selectively to critical objects to maintain optimal frame rates on mobile devices.
- Art Direction and Consistency: Anisotropic textures should align with your game’s art direction and style, like any graphical effect. Consistency is critical in creating a visually coherent world, so ensure that the level of anisotropic effect is suitable for the overall aesthetics of your game.
Pros of Using Anisotropic Textures:
- Realism and Immersion: Anisotropic textures can significantly enhance the realism of game environments by simulating the behavior of real-world materials. The elongated reflections aligning with surface orientation create a sense of depth and immersion, making the virtual world feel more believable and engaging.
- Visual Fidelity: Anisotropic textures add a high level of detail to surfaces, particularly on objects with micro-geometry or grooves. This attention to detail elevates the overall visual quality of the game, resulting in more polished and professional-looking graphics.
- Artistic Expression: Anisotropic textures open new creative possibilities for artists and developers. They can design unique and visually captivating game worlds, allowing for the creation of a wide range of materials with distinct reflective properties.
- Realistic Materials: Anisotropic textures are beneficial for materials like brushed metal, wood grain, fabrics, and hair, where the anisotropic behavior is a defining characteristic. These textures help replicate the specific reflective patterns and orientations of these materials.
- Accurate Surface Representation: Anisotropic textures can accurately represent surfaces with directional properties, such as brushed or scratched metal surfaces. This level of accuracy is challenging to achieve with traditional textures.
Cons of Using Anisotropic Textures:
- Performance Impact: Implementing anisotropic textures can be more computationally expensive than standard textures. The additional calculations required for anisotropic filtering may impact the game’s overall performance, especially on lower-end devices.
- Texture Creation Complexity: Creating anisotropic textures can be more challenging and time-consuming than standard textures. Artists need to generate specialized textures that encode the direction of elongated reflections, which may require learning new tools or techniques.
- UV Mapping Challenges: Properly mapping texture coordinates (UV mapping) is crucial for anisotropic textures to align correctly with the surface’s orientation. Ensuring seamless UV mapping can be complex; improper mapping may result in visual artifacts.
- Limited Support in Some Shaders: Unity’s built-in shaders offer some support for anisotropic filtering, but they may have limitations compared to custom shaders. This can restrict fine-tuning options and may require developers to invest more time creating custom shaders to achieve the desired effect.
- Compatibility with Mobile Platforms: Anisotropic textures can impact performance more, making them less suitable for specific mobile platforms or lower-end devices. When using anisotropic textures in mobile games, careful optimization and consideration of performance implications are necessary.

Conclusion:
Anisotropic textures are a powerful tool for game developers seeking to elevate the visual quality of their projects. Anisotropic filtering contributes to a more immersive and captivating player experience by enhancing the realism and detail of textured surfaces. As you delve into the world of anisotropic textures in Unity, experiment with different textures, anisotropic levels, and angles to achieve the desired visual effect. Carefully implemented anisotropic textures can turn an impressive game into an astonishing visual masterpiece. So, incorporate anisotropic textures into your Unity projects to take your game graphics to the next level! Anisotropic textures in Unity present an exciting opportunity for game developers and artists to elevate their projects’ visual quality and realism.
In conclusion, textures are a fundamental element in game development and computer graphics, which is pivotal in enhancing visual fidelity, realism, and immersion in virtual worlds. Throughout this discussion, we explored anisotropic textures in Unity and the different types commonly used in game development. Here are the key takeaways from our discussion:
- Anisotropic Textures in Unity: Anisotropic textures simulate the behavior of real-world materials by introducing elongated reflections that align with the surface’s orientation. Unity provides tools and shaders to implement anisotropic textures, enhancing game environments’ visual quality and realism.
- Types of Textures: We discussed various textures used in games, including diffuse, normal, specular, roughness, ambient occlusion, emissive, height, opacity, and anisotropic maps. Each texture serves a specific purpose, such as defining surface color, simulating bumps, controlling specular highlights, determining surface roughness, and more.
- Pros of Anisotropic Textures: Anisotropic textures offer enhanced realism, visual fidelity, and artistic expression. They accurately represent materials with directional characteristics and contribute to a more immersive gaming experience.
- Cons of Anisotropic Textures: Anisotropic textures can impact performance due to additional calculations, require complex texture creation and UV mapping, and may have limited support in some shaders. Proper optimization and consideration of performance implications are essential, especially for mobile platforms.
- Creative Possibilities: Understanding different texture types opens creative possibilities for game developers and artists. Developers can create visually captivating and cohesive game worlds that captivate players by skillfully combining these textures.
Textures are a powerful tool for elevating the quality of game graphics, allowing developers to craft lifelike environments and engage players on a deeper level. Striking a balance between visual fidelity and performance is critical, and leveraging anisotropic textures and other texture types judiciously can lead to a more polished and immersive gaming experience.
As game development evolves, textures will remain vital to creating captivating and realistic virtual worlds. With constant advancements in technology and rendering techniques, game developers will continue to push the boundaries of visual realism, ultimately providing players with more prosperous and more immersive gaming experiences. Each type of texture serves a specific purpose in the rendering pipeline and contributes to the game world’s overall visual fidelity and realism. Game developers can use and combine these textures to create stunning and immersive virtual environments for players to explore and enjoy. Anisotropic textures in Unity present an exciting opportunity for game developers and artists to elevate their projects’ visual quality and realism.
For more topics, see https://bleedingedge.studio/blog/

