In the vast realm of 3D graphics, one of the pivotal techniques that contribute to the realism and visual appeal of rendered objects is UV Map. This technique is indispensable for applying textures to 3D models, enabling artists to breathe life into their creations with intricate details, colors, and patterns. Understanding UV Map is essential for any aspiring 3D artist or seasoned professional seeking to enhance the quality of their work. In this comprehensive guide, we will delve into the intricacies of UV Map, its importance in texturing, and the various methods employed to achieve stunning results.
What is UV Mapping?
Before diving into the specifics, let’s clarify what UV Map entails. In 3D graphics, UV Map is the process of projecting a two-dimensional image onto a three-dimensional model. The term “UV” refers to the 2D coordinate system used to map the texture onto the model’s surface. Unlike the traditional XYZ Cartesian coordinate system used to define the geometry of 3D models, the UV coordinate system exists purely for texture mapping.
The Importance of UV Map
UV Map plays a crucial role in convincingly texturing 3D models. Without proper UV Map, textures would appear distorted, stretched, or misaligned, detracting from the overall realism of the scene. By meticulously defining how textures are applied to different parts of a model, UV Map allows artists to control the appearance of surface details such as wood grain, fabric patterns, and surface imperfections, thus adding depth and visual interest to their creations.
UV Map Techniques
There are several techniques for UV Map, each suited to different scenarios and preferences. Some of the most common methods include:
- Planar Mapping: This method involves projecting the texture onto the model from a single direction, typically either along the X, Y, or Z-axis. Planar mapping is functional for objects with flat or predominantly planar surfaces.
- Cylindrical Mapping: Cylindrical mapping involves wrapping the texture around a cylindrical object, such as a bottle or a column. This technique ensures that the texture seamlessly covers the surface without distortion.
- Spherical Mapping: Similar to cylindrical mapping, spherical mapping involves wrapping the texture around a spherical object, such as a globe or a basketball. This technique is ideal for objects with rounded surfaces.
- Box Mapping: Box mapping treats the 3D object as if it were enclosed in a box and projects the texture onto each face of the box. This method is commonly used for objects with uniform geometry, such as crates or buildings.
- Unwrapping: Unwrapping involves manually defining seams on the 3D model and flattening it into a 2D representation, similar to unfolding a cardboard box. This allows artists to meticulously control how the texture is applied to each part of the model, resulting in precise and detailed texturing.
Best Practices for UV Map
Achieving optimal results with UV Map requires attention to detail and adherence to best practices. Here are some tips to keep in mind:
- Minimize Seam Visibility: When defining seams for unwrapping, aim to place them in inconspicuous areas or along natural seams in the geometry to minimize their visibility in the final render.
- Maintain Uniform Texel Density: Texel density refers to the ratio of texture pixels to the corresponding surface area on the model. Aim to maintain consistent texel density across the entire model to avoid texture stretching or distortion.
- Use Texture Painting Software: Texture painting software such as Substance Painter or Mari offers powerful tools for painting directly onto 3D models, streamlining the UV Mapand texturing process and allowing for greater artistic control.
- Experiment with Procedural Textures: In addition to traditional image-based textures, consider incorporating procedural textures generated algorithmically. Procedural textures offer flexibility and scalability, allowing for the creation of complex surface details without the need for large texture maps.
UV Map Tools and Software: Enhancing Texture Precision
In the intricate world of 3D graphics and texturing, having access to the right tools and software can make all the difference in achieving precision and realism in UV Map. While the process of UV Map itself requires careful planning and execution, leveraging specialized software can significantly streamline the workflow and empower artists to create stunning textures with ease. In this continuation of our comprehensive guide to UV Map, we will explore some of the top UV Map tools and software available, along with their features and benefits.
Autodesk Maya
Autodesk Maya is a renowned 3D modeling and animation software widely used in the entertainment industry. Alongside its robust modeling and animation capabilities, Maya offers powerful UV Map tools that enable artists to unwrap and texture their 3D models efficiently. With features such as automatic UV unwrapping, interactive UV editing, and seamless integration with other Autodesk products like Mudbox and Substance Painter, Maya provides a comprehensive solution for UV Map and texturing workflows.
Blender
Blender, an open-source 3D creation suite, has gained immense popularity among artists and hobbyists alike for its versatility and accessibility. In addition to its extensive modeling, animation, and rendering features, Blender offers a suite of UV Map tools that rival those found in commercial software. From basic UV unwrapping to advanced seam editing and projection painting, Blender provides a comprehensive set of tools for achieving precise and detailed textures on 3D models.
Substance Painter
Substance Painter is a cutting-edge texture painting software explicitly designed for 3D artists and game developers. With its intuitive user interface and powerful painting tools, Substance Painter revolutionizes the process of texturing by allowing artists to paint directly onto 3D models in real time. In addition to its robust painting capabilities, Substance Painter offers advanced masking, layering, and material blending features, making it an indispensable tool for creating highly detailed and realistic textures with unparalleled precision.
3ds Max
Autodesk 3ds Max is another industry-standard 3D modeling and animation software known for its comprehensive feature set and workflow efficiency. With its built-in UV Map tools, 3ds Max provides artists with the flexibility to create UV layouts, define seams, and adjust texture coordinates with ease. Additionally, 3ds Max offers seamless integration with other Autodesk products, such as Mudbox and Substance Painter, allowing for a smooth transition between different stages of the texturing process.
UV Layout
UV Layout is a specialized standalone software explicitly designed for UV Map and unwrapping tasks. Unlike traditional 3D modeling software, UV Layout focuses solely on the UV Map process, offering a range of tools and features optimized for efficient UV manipulation. With its unique approach to UV unwrapping, including tools for flattening and packing UV islands, UV Layout provides:
- Artists with unparalleled control over the UV Map
- Resulting in clean.
- Organized UV layouts with minimal distortion.
In the world of 3D graphics and texturing, having access to the right tools and software can significantly enhance the precision and quality of UV mapping. Whether you’re unwrapping complex geometry, painting detailed textures, or optimizing UV layouts for efficient rendering, leveraging specialized UV mapping tools and software can streamline your workflow and empower you to create stunning textures with ease. Whether you prefer industry-standard software like Autodesk Maya and 3ds Max or specialized tools like Substance Painter and UV Layout, investing in the right tools for UV mapping is essential for achieving professional-quality results in your 3D projects.
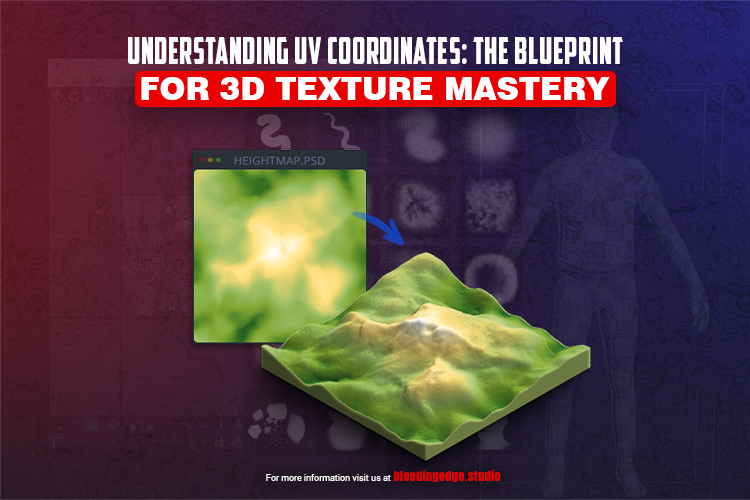
Understanding UV Coordinates: The Blueprint for 3D Texture Mastery
In the realm of 3D graphics, UV coordinates serve as the cornerstone of texture mapping, providing a blueprint for precisely applying textures onto three-dimensional surfaces. While UV Map itself may seem daunting at first, grasping the fundamentals of UV coordinates is crucial for achieving mastery in texturing and unleashing your creative potential. In this segment of our comprehensive guide to UV Map, we will delve into the intricacies of UV coordinates, their significance in texture mapping, and how to effectively leverage them to create stunning textures in your 3D projects.
What are UV Coordinates?
UV coordinates are a two-dimensional coordinate system used to specify the mapping between points on a 3D surface and corresponding points on a 2D texture map. In simple terms, UV coordinates define how textures are applied to the surface of a 3D model by mapping each vertex of the model to a specific point on the texture map. The UV coordinate system is independent of the model’s geometry and exists solely for texture mapping.
Understanding UV Map
UV Map involves the process of assigning UV coordinates to the vertices of a 3D model, thereby defining how textures are wrapped around its surface. This process typically involves unwrapping the model’s geometry into a flat, two-dimensional representation, known as a UV map or UV layout, which can then be used to texture the model in a 2D painting or editing software.
UV Map Techniques
There are several techniques for UV Map, each suited to different scenarios and preferences. Some of the most common methods include:
- Automatic UV Unwrapping: Many 3D modeling software packages offer automatic UV unwrapping tools that can quickly generate UV maps based on the geometry of the model. While these tools can be convenient for simple shapes, they may produce suboptimal results for more complex geometry.
- Manual UV Unwrapping: Manual UV unwrapping involves manually defining seams on the 3D model and flattening it into a 2D representation. This method provides greater control over the UV layout and is ideal for achieving precise and distortion-free texture mapping.
- Projection Mapping: Projection mapping involves projecting textures onto the model from various directions, such as planar, cylindrical, or spherical projections. This technique can be helpful for quickly applying textures to specific areas of the model without the need for manual unwrapping.
Best Practices for UV Map
To achieve optimal results with UV Map, it’s essential to adhere to best practices and techniques. Here are some tips to keep in mind:
- Minimize Texture Distortion: Aim to maintain uniform texel density across the UV map to minimize texture distortion and stretching on the 3D model’s surface.
- Avoid Overlapping UVs: Ensure that UV islands do not overlap on the UV map, as this can cause artifacts and blending issues in the final texture.
- Optimize UV Layout: Arrange UV islands efficiently on the UV map to minimize wasted texture space and maximize resolution for each part of the model.
- Check for Seam Continuity: Verify that seams on the UV map align seamlessly with natural seams or edges on the 3D model to avoid visible texture seams in the final render.
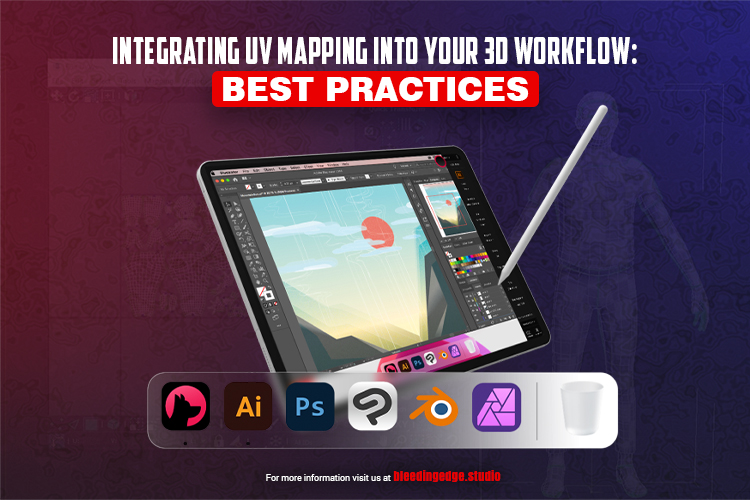
Integrating UV Map into Your 3D Workflow: Best Practices
Mastering UV Map is a crucial skill for any 3D artist aiming to create visually compelling and realistic textures. However, effective integration of UV Map into your overall 3D workflow is equally essential to ensure efficiency, consistency, and quality in your projects. In this segment of our comprehensive guide to UV Map, we will explore best practices for seamlessly incorporating UV Map into your 3D workflow, from initial model creation to final rendering.
Plan Ahead
Before diving into UV mapping, take the time to plan your approach. Consider factors such as the complexity of the model, the desired level of detail in the textures, and the overall aesthetic you wish to achieve. Planning will help you make informed decisions about UV mapping techniques, texture resolution, and optimization strategies, ultimately streamlining the process and saving time in the long run.
Optimize Model Geometry
Well-optimized model geometry can significantly facilitate the UV mapping process. When creating 3D models, aim to maintain a clean topology with evenly distributed edge loops and minimal distortion. Avoid overly complex geometry where possible, as this can lead to challenges during UV unwrapping and texturing. By optimizing your model’s geometry from the outset, you’ll set yourself up for smoother UV mapping and more consistent results.
Use UV Mapping Tools Wisely
While manual UV mapping offers maximum control and precision, it can be time-consuming, especially for complex models. Leveraging UV mapping tools and features available in your chosen 3D software can help streamline the process and improve efficiency. Experiment with automatic UV unwrapping algorithms, projection mapping techniques, and UV manipulation tools to find the best approach for each project. Remember that a combination of automated and manual techniques may yield the most optimal results for specific scenarios.
Maintain Consistent Texel Density
Texel density refers to the ratio of texture pixels to the corresponding surface area on the 3D model. Consistent texel density ensures uniform texture resolution across different parts of the model, preventing texture stretching or distortion. When UV mapping, pay attention to texel density and strive to maintain consistency throughout the UV layout. Tools and plugins are available to help visualize texel density and ensure an even distribution of texture resolution across the model’s surface.
Test and Iterate
UV mapping is often an iterative process, especially when fine-tuning UV layouts and adjusting texture placement. Take the time to test different UV mapping techniques, texture resolutions, and mapping orientations to find the optimal solution for your project. Don’t hesitate to iterate on your UV maps and textures based on feedback and visual inspection. Regular testing and iteration are essential for refining your UV mapping skills and achieving the desired level of quality in your textures.
Document Your Workflow
As you progress through the UV mapping process, document your workflow and keep detailed records of your UV layouts, texture settings, and mapping techniques. Creating documentation or annotations within your 3D project file can help streamline collaboration with team members and ensure consistency across multiple iterations or revisions. Additionally, maintaining organized UV maps and texture assets will make it easier to revisit and make adjustments to your work in the future.
Conclusion
In the realm of 3D graphics, mastering UV mapping is essential for achieving realistic and visually compelling results. By understanding the principles of UV mapping and employing various techniques and best practices, artists can effectively texture their 3D models with precision and creativity. Whether creating lifelike characters, immersive environments, or intricate objects, UV mapping remains a cornerstone of the texturing process, allowing artists to breathe life into their digital creations with stunning detail and realism.
In this comprehensive guide to UV mapping, we’ve explored the art and science behind one of the fundamental techniques in 3D graphics. From understanding UV coordinates to integrating UV mapping into your 3D workflow, we’ve covered essential concepts, techniques, and best practices for achieving stunning textures with precision and realism.
UV mapping serves as the blueprint for texture mapping, providing a crucial link between 3D geometry and 2D textures. By mastering UV mapping techniques and leveraging specialized tools and software, artists can efficiently unwrap complex geometry, apply textures with precision, and bring their digital creations to life with intricate detail and visual appeal.
Throughout our discussion, we’ve emphasized the importance of planning, optimization, and iteration in the UV mapping process. From planning and optimizing model geometry to maintaining consistent texel density and testing iteratively, each step plays a vital role in achieving high-quality results and streamlining the workflow.
Ultimately, mastering UV mapping requires a combination of technical skill, artistic vision, and attention to detail. By following best practices, experimenting with different techniques, and embracing a mindset of continuous improvement, artists can unlock the full potential of UV mapping and elevate the quality of their 3D projects.
As technology continues to evolve and new tools and techniques emerge, UV mapping remains a foundational skill for 3D artists across various industries, from animation and visual effects to game development and product design. With a solid understanding of UV mapping principles and a commitment to refining their craft, artists can create immersive, visually stunning experiences that captivate audiences and inspire imagination.
For more topics, see https://bleedingedge.studio/blog/